Release 2.0 for Windows NT
A55738-01
Library |
Product |
Contents |
Index |
| Oracle Web Publishing Assistant Getting Started Release 2.0 for Windows NT A55738-01 |
|
This chapter discusses how to use the three tutorials included with Oracle Web Publishing Assistant.
Specific topics discussed are:
Each tutorial in this chapter uses increasingly more complex templates to format retrieved database information. To learn how the different effects are achieved, view the template structure in an HTML editor or view the source code from within your browser.
The first tutorial uses the default template. This template is a simple page, which will display information retrieved from one table using a Java applet. The database query used in the tutorial retrieves information from the SCOTT.EMP table (installed automatically when you install Oracle8 using the Typical Installation option).
Oracle Web Publishing Assistant merges the results of the database query with the template. The result is a web page query. All of your scheduled web page queries are listed in the Oracle Web Publishing Assistant file listing.
To create the web page:
From the taskbar, choose Start > Programs > Oracle for Windows NT > Oracle Web Publishing Assistant.
Oracle Web Publishing Assistant appears. If you have never created a web page query using the Create Web Page Wizard before or if you do not have any web page queries scheduled in the listing, then the welcome screen appears with a Create Web Page button. To bypass the welcome screen upon subsequent use of Oracle Web Publishing Assistant, clear the check box on the screen.
The screen Create Web Page Wizard - Step 1 of 4 appears:

| Field | Description |
|---|---|
|
User Name |
Enter the user SCOTT. |
|
Password |
Enter the password TIGER. |
|
Database |
Leave the field blank to connect to the local database. |
The screen Create Web Page Wizard - Step 3 of 4 appears.
Select any day and any time in the future to generate the web page:

Select Generate Default Template File.
The Summary Screen appears, confirming that web page creation was successful. Click OK to dismiss the screen.
The resulting web page (the default file name is WEB.HTM) looks like this:
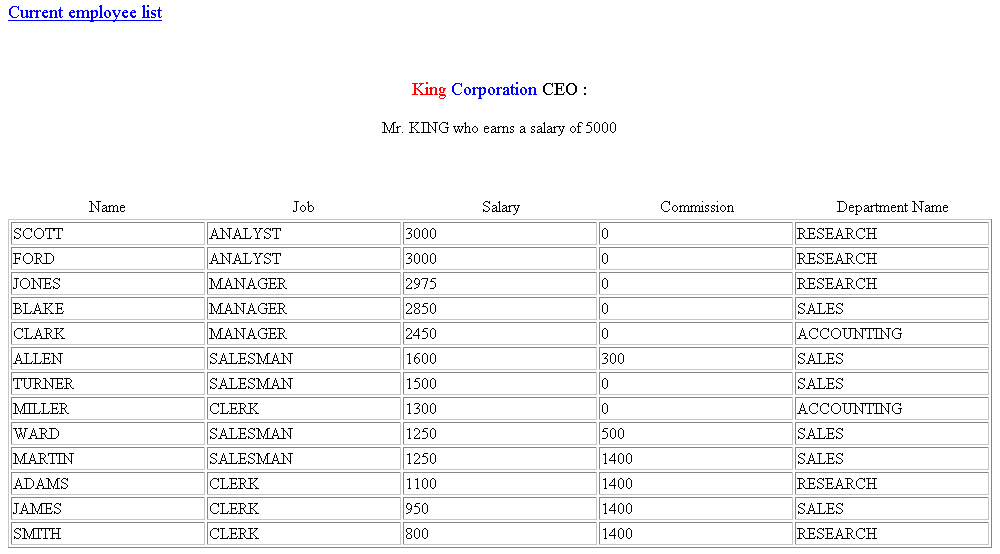
The second tutorial queries the SCOTT.EMP table (installed automatically when you install Oracle8 using the Typical Installation Option) and formats the retrieved information using the template EXAMPLE2.HTX.
To create the web page using the template EXAMPLE2.HTX:
From the taskbar, choose Start > Programs > Oracle for Windows NT > Oracle Web Publishing Assistant.
Oracle Web Publishing Assistant appears. To bypass the welcome screen upon subsequent use of Oracle Web Publishing Assistant, clear the check box.
| Field | Description |
|---|---|
|
User Name |
Enter the user SCOTT. |
|
Password |
Enter the password TIGER. |
|
Database |
Leave the field blank to connect to the local database. |
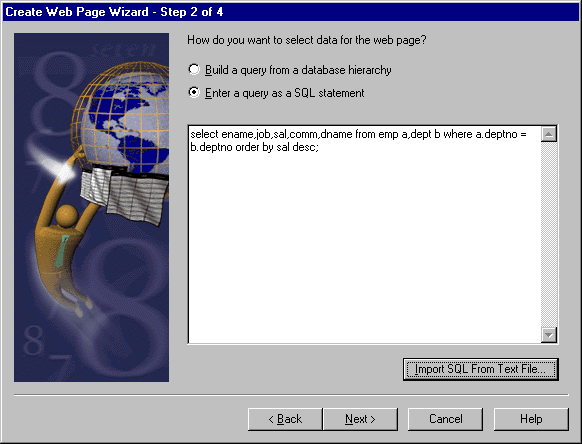
Use the provided SQL script to enter the SQL statement. The SQL script is stored in an ASCII text file located in the directory ORANT\OWAST\SAMPLES.
The SQL script appears in the field:
The screen Create Web Page Wizard - Step 4 of 4 appears.
The Summary Screen appears, confirming that web page creation was successful. Click OK to dismiss the screen.
The resulting web page EXAMPLE2.HTM looks like this:
The third tutorial is based on a template which uses frames, enabling you to merge two separate query statements into one web page. This tutorial queries the SCOTT.EMP table (installed automatically when you install Oracle8 Enterprise Edition or Oracle8 using the Typical Installation Option) and formats the retrieved information using the templates EXAMPLE3.HTX and DETAIL.HTX.
To create the web page:
From the taskbar, choose Start > Programs > Oracle for Windows NT > Oracle Web Publishing Assistant.
Oracle Web Publishing Assistant appears. To bypass the welcome screen upon subsequent use of Oracle Web Publishing Assistant, clear the checkbox.
| Field | Description |
|---|---|
|
User Name |
Enter the user SCOTT. |
|
Password |
Enter the password TIGER. |
|
Database |
Leave the field blank to connect to the local database. |
Use the provided SQL script to enter the SQL statement. The SQL script is stored in an ASCII text file located in the directory ORANT\OWAST\SAMPLES.
The SQL script appears in the field:

The screen Create Web Page Wizard - Step 3 of 4 appears.
Select any day and any time in the future to generate the web page:
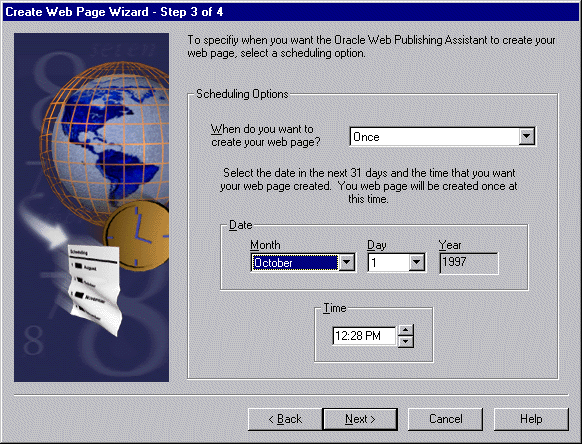
Select Use Template File. Navigate to ORANT\OWAST\SAMPLES\EXAMPLE3.HTX.
The Summary Screen appears, confirming that web page creation was successful. Click Finish to dismiss the screen.
The resulting web page MAIN.HTM looks like this:

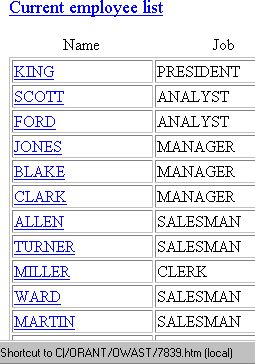
The web page you have created thus far is similar to the web page in the second tutorial, except that the employee names are hot (linked).
The next section explains how you can further develop the page by incorporating a frame which shows a set of information from a separate query on the same web page. In this example, you will create a frame which shows the details of each employee listed in the first column of the web page when the name of that employee is clicked.
Note that when you pass the mouse pointer over the employee name, an HTML file is linked to the name. The file each employee name points to is what you will be creating in the next section (EMP#.HTM, where EMP# is the employee number). After you complete the next section, the result will be a file EXAMPLE3.HTM which incorporates the files MAIN.HTM and EMP#.HTM.
To illustrate, the first employee listed is KING. The employee number associated with KING is 7839. In order to create the frame of information, you must know the employee number of each employee. This example will stop with employee KING, but you can create as many as you want.
To continue with Tutorial 3 and create the second part of the web page:
Use the predefined SQL script EXAMPLE3A.SQL to enter the SQL statement. For more information on how to use the script, see Step 5.
The statement reads:
select empno,ename,job,sal,comm,hiredate,dname from emp a, dept b where
a.deptno = b.deptno and empno=emp# order by sal desc;
where emp# is the employee number.
Select Use Template File. Navigate to ORANT\OWAST\SAMPLES\DETAIL.HTX.
The Summary Screen appears, confirming that the web page creation was successful. Click Finish to dismiss the screen.
Note that only the files MAIN.HTM and EMP#.HTM appear in the file listing. The file EXAMPLE3.HTM will not appear in the file listing of Oracle Web Publishing Assistant:
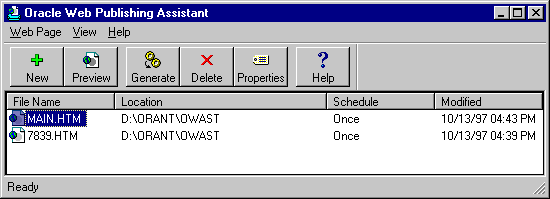
When you are finished creating the frames, your resulting web page will allow a user to see the Employee Details of each of the employees by clicking on the employee name. The information contained in the frame shows the information relevant to the selected name.